The Stream tool offers two audio-visual stream options: one is your own individual stream, and the other is the Meeting – this embeds a Jitsi meeting directly in the live stage. This is done using Jitsi Videobridge, and allows audio-visual conferencing with no or extremely minuscule latency. Thanks Jitsi!
The Meeting tool invites everyone present on the stage – audience as well as players – to share their mic and webcam. This is very useful for presentations and training sessions, or post-show discussions.
When you use either of these tools, your browser will ask you to “allow” or “share” your webcam and microphone; you can save these settings in your browser if you don’t want to be asked every time.
This chapter first explains the Meeting tool, and then the individual stream.
Create a Meeting
Click on the “Meeting” icon in the left-hand menu, and a tool overlay appears at the top of the screen showing a plus sign and “Create Meeting”.
Click on “Create Meeting” and a pop-up window opens asking you to name the room.
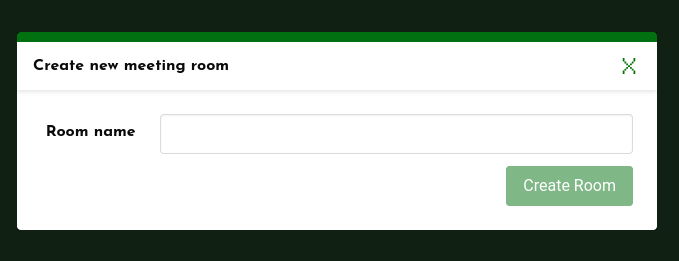
Give the room a name. This can be anything, but as it will be visible at the top of the meeting window, it’s good to use a name that makes sense within your performance.
Click “Create Room” and you’ll see its icon appear in the overlay. Drag the icon onto the stage.
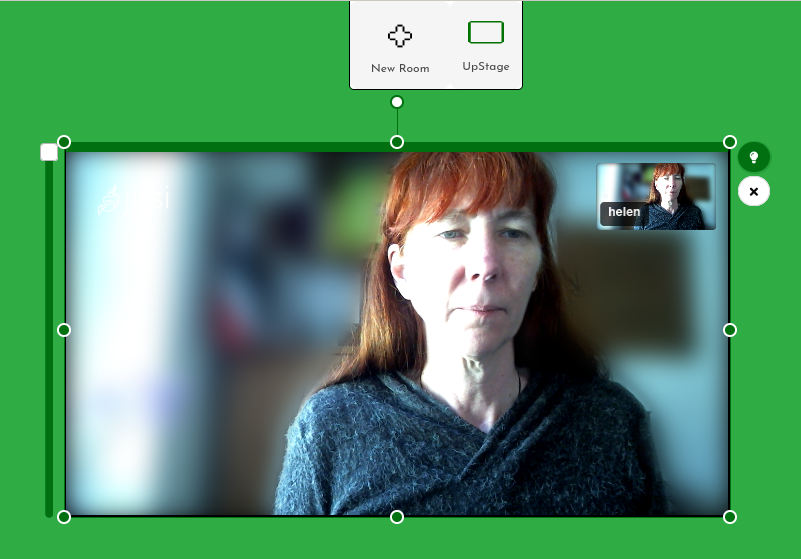
As with other UpStage media, the meeting isn’t visible to others until you turn on the light bulb icon at the top right of the object. You can move the meeting, resize or rotate it and adjust the transparency before you click the light bulb icon to reveal it to everyone. When you click on the light bulb, everyone – players and audience – on the stage will be invited to join the meeting by sharing their mic and webcam.
Jitsi tools
Roll your cursor over any part of the meeting window and the Jitsi tools will appear along the bottom as well as information in the centre top. These tools are visible only to the individual who has moved their cursor over the window, not to everyone on the stage, but anyone can do this, whether they’re a logged in player or an audience member.
Note: if you can see the green frame around the meeting window, with the opacity slider and handles for adjusting the size of the window, you won’t get the Jitsi tools. You will need to click somewhere else on the stage so that the frame disappears, then roll your cursor over the meeting window without actually clicking on it.
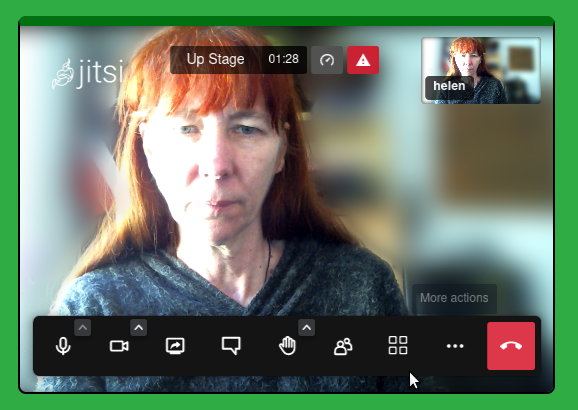
The Jitsi tools allow each individual (players and audience) to mute or unmute their microphone, show or mute their webcam, alter the view (grid or speaker), share their screen, write in the Jitsi chat, raise their hand and other Jitsi functionalities.
There’s also the red hang-up button, to leave the meeting. If someone does this, they’ll still be in UpStage, but the Jitsi window on their screen will change to show the home screen from Jitsi. To re-enter the meeting, they can either reload the whole stage, or they can enter the name of the meeting room into the field on the Jitsi home page (another reason for giving your meeting room a meaningful name).
If you don’t want your audience to access the Jitsi tools, you could try using a prop, drawing or text object to cover the bottom area of the Meeting window. But remember that variables such as screen resolution and different browsers may mean that positioning varies.
If you only need to use Meeting for audio, you can hide it behind the chat window, or make it small and/or transparent. This prevents or make it more difficult for others to find the Jitsi tools.
Individual stream
Place an individual stream on the stage
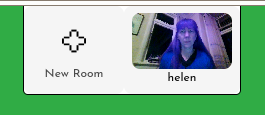 Click on the Stream icon in the left-hand toolbar and the overlay opens. You’ll be asked to share or allow your computer’s webcam and microphone. Once you’ve done this, you’ll see a thumbnail of your webcam in the overlay.
Drag the thumbnail onto the stage. You may see a buffering icon before your stream appears. As with other media, your stream is only visible to you until you activate the light bulb icon. Use the stream frame and the right-click menu to position your stream as you want, then click on the light bulb icon to reveal it to everyone else.
If you need to mute your stream, you may be able to do this by right-clicking on the stream’s thumbnail in the overlay, or by clicking an icon in the browser’s URL bar that gives access to camera and mic permissions. This depends on the browser you are using and some may be easier to mute than others. If you are using OBS, you can adjust the volume there.
Once your individual stream is on the stage with the light bulb activated, another player can operate it or remove it. This is useful if you are performing to the camera and can’t reach your keyboard.