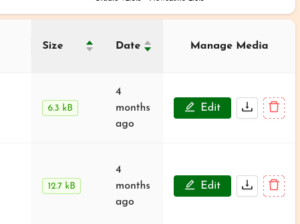
 To modify a media item that has been uploaded to UpStage, nagivate to the Studio and locate the item you want to modify. Then at the far right in the column Manage Media, click on the “Edit” button.
This brings you to the media item’s edit interface.
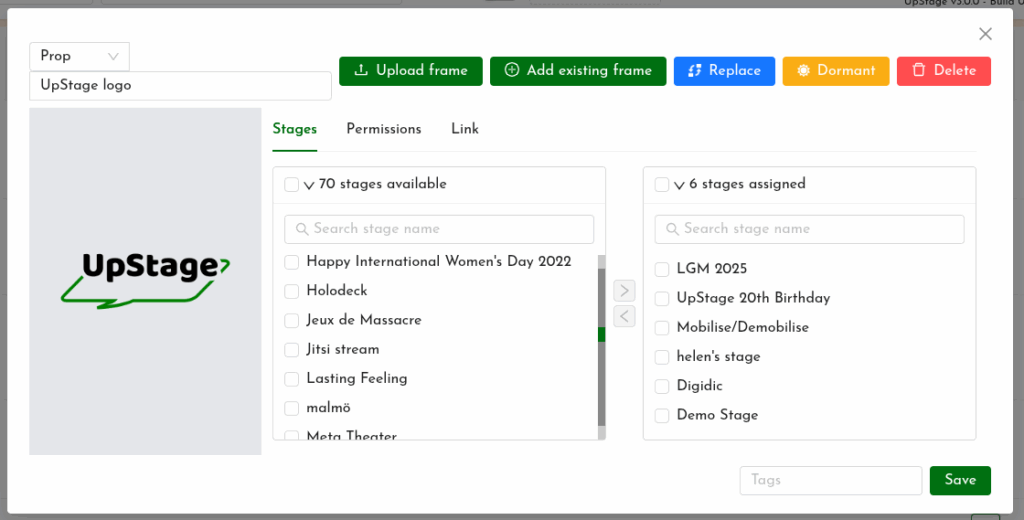
Here you can do the following:
- change the media type using the drop-down list (avatar, prop, backdrop, etc.)
- change the media item’s name
- add additional frames to a multi-frame media item
- replace the uploaded file with a new one
- mark the file as Dormant, or Delete it
- assign it to stages, or remove it from stages
- change the permissions
- change and save an avatar’s voice
- change and save a link for a prop or avatar.
For step by step instructions for each of these actions, please see the previous chapter, Upload media.
What modifying media does and doesn’t do
When you modify a media item in the Studio, these changes will take affect on all stages where that media item has been assigned. For example:
- If you alter an avatar’s voice, this will be the voice for this avatar on all stages (although it can be temporarily modified on a specific stage).
- If you give a prop or avatar a clickable link, this link will be active on all stages that the prop or avatar is assigned to.
- If you add or remove frames from a multi-frame media item, this will alter the frames on all stages that it’s assigned to.
If you unassign a media item from a stage, this doesn’t delete the media item from the UpStage server. It will no longer be available to use on the stage that you’ve unassigned it from, but it will still be available on any other stages it has been assigned to, and in the Studio.
Dormant or Delete
If you no longer need a media item any more, you can delete it. This will remove it from the UpStage server and it will no longer be available on any stages or visible in your media list. It will also be missing from any replay recordings that it may be in. We encourage players to delete any unnecessary media in order to avoid the server filling up with digital rubbish.
If you don’t need a media item any more but you do want it to still be available for replay recordings, you can use the “Dormant” tool. This will remove the media item from your media list and any stages it was assigned to; it will no longer be visible or available to be assigned to a stage. However it will not be deleted from the server, meaning that if it’s needed for a replay recording, it will be there.
If you’ve set a media item to “Dormant” and later want to reactivate it, you will need to as an Admin to do this.
Save your changes
You must always remember to click the green “Save” button in the lower right-hand corner of a media item’s edit interface if you want to save the changes you’ve made.