This section explains how to upload digital media – images, animations, audio and video – to UpStage so that they can be assigned to a live stage and used in your cyberformances.
Before you upload anything, please see the previous chapters on Creating graphics for UpStage and Creating audio for tips on creating media.
Upload media
 Once you have created your media items, navigate to the Media section of the Studio. In the banner at the top of the screen you’ll see the button “+ New Media” at top left. Click on this and a file upload window opens. Drag the media item you want to upload from your computer onto the window.
The media edit interface opens; here you can (these things are explained in detail below):
- select the media type from the drop-down list (avatar, prop, backdrop, etc.)
- give the media item a name
- upload additional frames if you want to make a multi-frame media item
- replace the uploaded file with a new one
- mark the file as Dormant, or Delete it
- assign it to one or more stages
- set permissions
- for avatars, you can select and save a voice
- for avatars and props, you can add a link.
Finally, click “Save” to create your media item.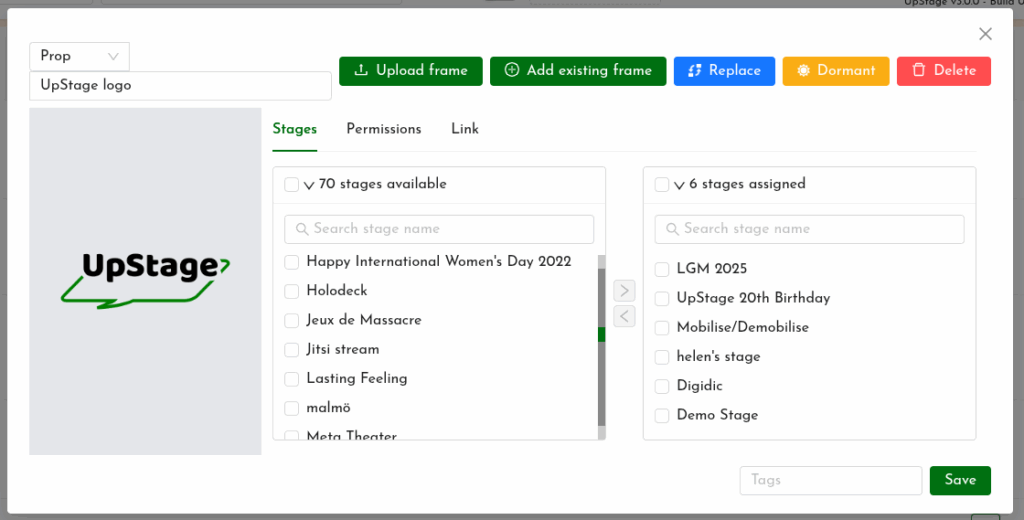
When you click “Save”, the edit interface closes and you are in the main interface of the Studio. You should see your new media item at the top of the list.
Media types
You must give your media item a type, so that when you assign it to a stage it will appear in the appropriate toolbar. Select the type that will allow you to use the media item in the way you want to use it on stage.
The media types are:
| Avatar | An avatar can be held by one player at a time; it can be given a voice, and speak with Text2Speech; and props can be attached to it. |
| Prop | A prop is a graphic object that can be operated by any player, and can be attached to an avatar. |
| Backdrop | A backdrop is an image that appears behind all other visual media on the stage, filling the background area completely. |
| Audio | Music, sound effects or other sounds that can be played on the stage. |
| Curtain | A full-screen image that covers the stage, hiding it from the audience just like a theatre curtain. |
Note: a media item can only be one type. If you want the same item to have more than one function – for example, a backdrop that’s also a curtain – you must upload the original file twice, as two separate media items.
Media name
The field next to media type allows you to give your media item a name. If you don’t enter anything here, UpStage will automatically use the filename. If your media item is an avatar, its name will display in the chat window when the avatar speaks.
It’s a good idea to give your media items short, meaningful names that will allow you to easily recognise the media item in the on-stage toolbars and in the Studio’s media list.
Frames
Adding frames allows you to create a multi-frame avatar, prop or backdrop. You can upload additional frames from your computer, or you can add frames that have already been uploaded to UpStage.
Uploading a new frame works the same way as uploading a new media item. To add an existing frame, follow these steps:
- Click on “Add an existing frame” in the media item’s edit interface.
- Find the frame you want to add in the media list.
- At the right-hand side of the list, click on “Append frames”.
- The new frame appears as a thumbnail at the end of the list of thumbnails in the media item’s edit interface; if you have more than four frames, you will need to scroll down to see it.
- Drag the thumbnails if you want to reorder them.
- When you’ve finished adding frames, remember to click “Save” in the bottom right-hand corner of the edit interface.
Assign to stages
You must assign your media item to a stage in order to be able to use it there in a performance. A media item can be assigned to many stages at the same time.
In the media item’s edit interface:
- If the list of available stages is not showing, click on the Stages tab.
- Find the stage or stages that you want to assign this media item to, and click the checkbox next to the stage name.
- Click on the green arrow between the two stages list.
- The selected stage(s) will appear in the right-hand list of assigned stages.
- Click “Save”.
Set permissions
Click on the Permissions tab (next to Stages) and select one of the following options from the drop-down list:
- Copyright free: the media item can be used and edited by other players in any way without need for permission.
- Use with acknowledgement: the media item can be used and edited by other players as long as the owner is acknowledged.
- Use with permission: other players must ask you for permission if they want to use this media item.
- Not shared: the media item can only be edited by the owner, and only operated by players who have access to a stage that the owner has assigned the media item to.
The notes field lets you save any copyright or acknowledgement details, which will be shared with any other player who you give permission to use or who acknowledges their use of the media. You should give clear instructions, for example if there is a copyright holder who needs to be acknowledged and where that acknowledgement should appear.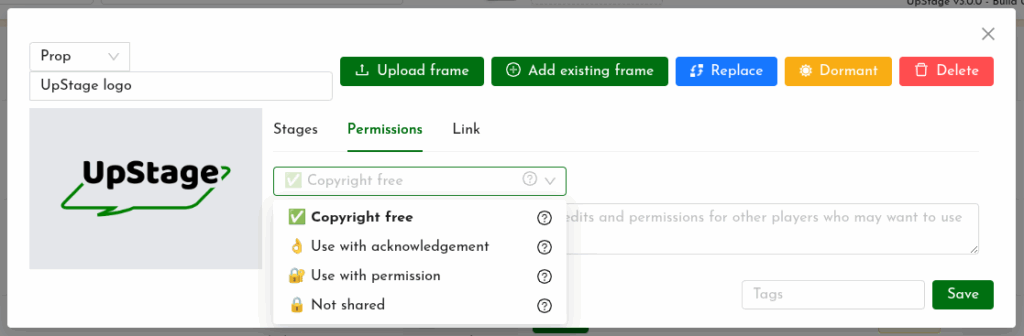
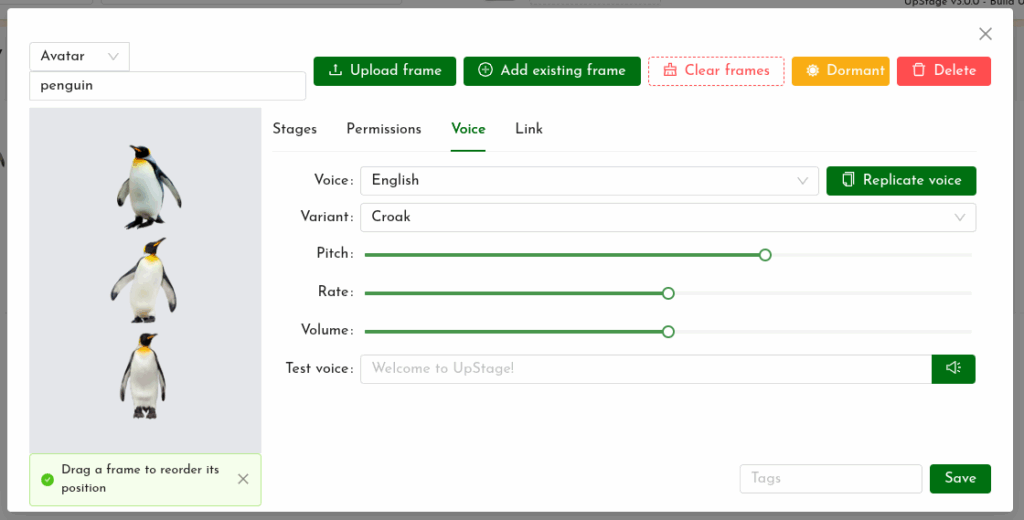
Avatar voices
If you’ve chosen Avatar as the type of media item, you’ll see the Voice tab in the media item’s “Edit” interface. Here you can set the avatar’s Text2Speech voice by selecting a voice and variant, and adjusting the sliders for pitch, rate and volume.
Test the voice by entering the text you want to hear spoken in the test field and clicking the green circle at the right-hand end of the text input field. You’ll hear the text spoken in the voice you’ve set, and can make further adjustments until you’re satisfied.
Clicking “Save” once you’ve modified the voice will mean that this voice will be used for this avatar on all the stages that it’s assigned to. See the chapter on Avatar speech and voices in the Live Stage Tools section for how to adjust the voice on the live stage.
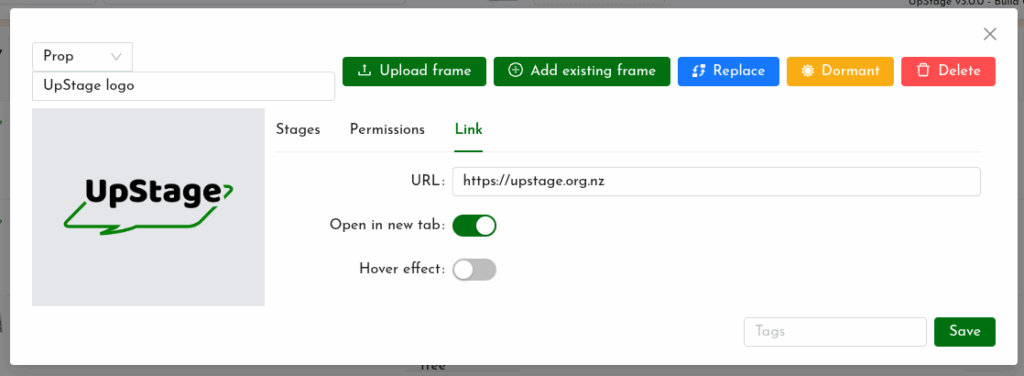
Link
If you want a prop or avatar to be a clickable link on stage, enter the URL here. During the cyberformance, the audience can click on it to open the URL in their browser.
Note that players will need to right-click on the prop or avatar and select “Open link” in order to visit the link. This is because clicking on the prop or avatar when you’re a player selects it for you to operate.
Save your changes
Click on the green “Save” button in the lower right-hand corner to upload your media item and save any other changes that you’ve made. You can go to the Manage Media “Edit” window at any time to edit the media item.