The Scenes tool allows you to prepare and save an arrangement of media that will appear together with a single click when you select that scene.
![]()
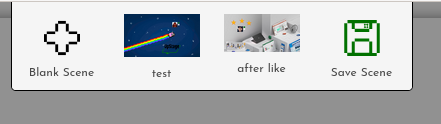
Select the Scenes icon in the left-hand toolbar. The scenes overlay is displayed at the top of the stage. Any previously saved scenes will appear as thumbnails, along with the “Blank Scene” and “Save Scene” buttons.
Click on Blank Scene to remove all media from the stage. This can be useful to clear the stage in any situation, not only when you want to create a new scene.
Create a new scene
To create a scene, arrange your media as you want it on the stage. You can reduce the opacity of avatars and props if you want to fade them in after you have started the scene. Audio files can be set to loop or not, and at the volume that you want.
Once you’re happy with the arrangement, click “Save Scene” in the Scenes overlay. You’ll be asked to give the scene a unique name. This will help you to identify which scene you want if you have two or more similar scenes. The saved scene will appear as a thumbnail in the scene overlay.
Display a saved scene
When you want to change to a scene you’ve previously saved, click on the thumbnail of that scene in the Scenes overlay. The stage will change to display the media you have saved as that scene.
Remove a saved scene
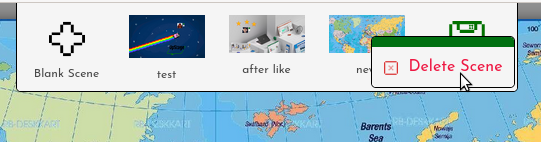
If you’ve saved a scene that you no longer need, you can delete it from the Scenes overlay by right-clicking on its thumbnail and selecting “Delete Scene”. This will delete the scene from the Scene tool overlay. It will not unassign the media from the stage, or remove it from the stage if it’s on stage when you delete the scene.