The Stage Management interface is where you can manage all aspects of a stage that you’ve created or been given access to edit. To reach this interface:
- Navigate to the Stages list: this is where you arrive when you log in from the Foyer, or click on “Stages” in the Studio menu.
- Find the stage you want to manage in the list of stages. The default view of your stages will include any stage that you have access to manage.
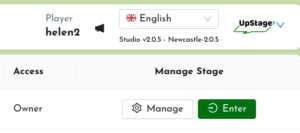 When you’ve found the stage you want, click on the “Manage” button at the right hand end of the stage listing.
Management interface
A banner at the top of the page gives the name of the stage, an “ENTER” button to enter the live stage, and tells you that you’re in the stage management interface. Below this, the left-hand menu contains the following options:
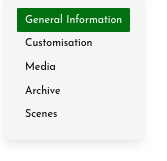
- General Information
- Customisation
- Media
- Archive (see the Replays and Chat logs chapters)
- Scenes
General information is explained below, and the other sections are explained in the following chapters.
General information
This is the same as the form to create a new stage. You can edit all of the information that you originally entered, except the URL.
At the upper right there is a row of buttons:
If you make changes to the general information of your stage, you must always remember to click “Save Stage” in order to save those changes.
“Clear Chat” removes all text from the chat window on the live stage. You can also do this from the on-stage tools. This does not remove the chats that are saved in the Archive section of Stage Management, but chats are not automatically archived, so make sure that you either have saved the chat or don’t want to keep it before you clear the chat.
“Sweep Stage” tidies up any media, text and drawing that has been left on the stage and sets it back to its default settings. It does not unassign media from the stage – everything will still be available in the toolbars to be used again on the stage. It does not force a reload – anyone on the stage at the time of the sweep will just see everything disappear from the stage. Any scenes that you’ve saved will still be accessible in the Scenes toolbar.
“Delete Stage” will delete the stage from the server. You’ll be prompted to download the archive for your stage (chat and replays) if you want to keep it, as this will also be deleted along with the stage. Note that deleting a stage does not delete from the server any media that has been assigned to the stage.
Players
To give other players access to your stage so that they can collaborate in your performance, move them from “Audience access only” to the “Player access” or “Player and edit access” list.
Click on a player’s name to move them to the right and increase their access. Right-click on a player’s name to move them to the left and decrease their access. Use the search field if you don’t see the username of the player you want to move.
You can move a whole list by clicking on the >> or << buttons instead of an individual player. This is useful if, for example, you’ve selected the team of players for your performance, have individually given them player access and now want to give all of them edit access as well.
Stage status and visibility
The “Status” and “Visibility” toggles control who can see and access your stage.
With the Status toggle, you can set your stage to either Live or Rehearsal. Live means that the public can enter; Rehearsal means that only logged-in players who have player access on this stage will be able to enter.
The Visibility toggle lets you choose whether or not your stage is shown on the Foyer. If you turn this toggle on, a thumbnail of your stage’s cover image will be shown in the grid of stages on the Foyer. You can use this to promote an upcoming performance and for audiences to easily enter the stage when it’s live.
Note: It’s very important to remember to change the status from Rehearsal to Live when you want your audience to enter!
Cover image
Select an image to display while the stage is loading. This is useful to give the audience information about the performance. You can create and upload a separate image, or use a backdrop that you’ll use in the performance. It should be a landscape-oriented graphic.
If you’ve turned on the Visibility toggle, the cover image is also used as a thumbnail image on the Foyer.
If you want to change a cover image that has already been set, click on the image that’s displayed in this section. A pop-up window will open and you can select from the existing images or upload a new one.
Remember to save!
If you’ve made changes to a stage’s general information, you must click the green “Save Stage” button at the top right of the interface. Otherwise, the changes you’ve made won’t be saved.